Taking a screenshot is one of the most useful digital skills that works the same basic way across all devices. Whether someone needs to save an important email, capture an error message, or share something interesting they found online, screenshots make it simple to grab exactly what appears on their screen.
The process typically involves pressing a few keys or tapping specific buttons, and the image gets saved automatically to their device. Most people only know one or two methods for their main device, but there are actually multiple ways to capture screens on every platform.
This guide covers everything from basic screenshot methods on Windows, Mac, and mobile devices to advanced techniques for editing and managing those captured images. Users will learn the fastest shortcuts, discover built-in tools they might have missed, and find solutions for common screenshot problems that pop up.
Understanding Screenshots
A screenshot is a digital image that captures exactly what appears on a device screen at a specific moment. These images serve many purposes and come in different file formats with varying quality levels.

What Is a Screenshot
A screenshot is a digital photograph of whatever is currently displayed on a computer, phone, or tablet screen. The image shows everything visible at the exact moment the screenshot is taken.
Screenshots capture the entire screen content as a single image file. This includes open windows, desktop backgrounds, apps, websites, and any other visual elements on the display.
Most devices have built-in screenshot tools. Users can take screenshots through keyboard shortcuts, button combinations, or special software applications.
The captured image gets saved as a file that can be opened, edited, shared, or stored like any other digital photo. Screenshots preserve the exact visual information from the screen in a permanent format.
Common Uses for Screenshots
People use screenshots to save important information that might disappear later. This includes saving receipts, confirmation numbers, error messages, or temporary content from apps and websites.
Screenshots help with troubleshooting technical problems. Users can capture error messages or unusual screen behavior to show tech support teams exactly what went wrong.
Work and education benefit from screenshots when creating tutorials, presentations, or documentation. Teachers and trainers use them to show step-by-step processes.
Social media users take screenshots to share funny posts, conversations, or interesting content with friends. Gaming enthusiasts capture memorable moments or high scores during gameplay.
Screenshots also serve as evidence for online disputes, cyber-bullying reports, or recording important conversations before they get deleted.
Screenshot Formats and Quality
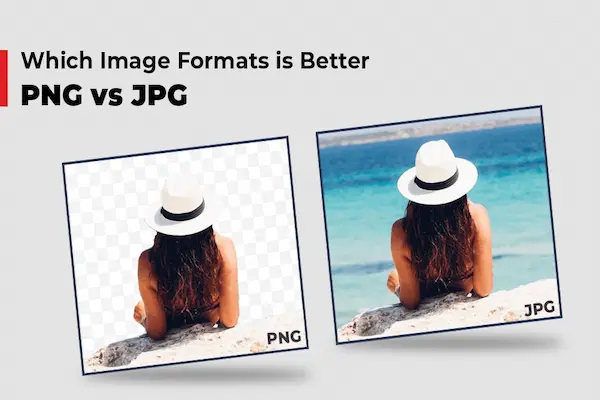
Screenshots typically save in three main file formats: PNG, JPEG, and BMP. PNG files offer the best quality with no compression loss but create larger file sizes.
JPEG files compress the image data, making smaller files that are easier to share. However, this compression can reduce image sharpness and color accuracy.
Image quality factors:
- Resolution – matches the device’s screen resolution
- Color depth – usually 24-bit color for full color range
- Compression – affects file size and image clarity
Most devices automatically choose the best format and quality settings. Users can often change these settings in their device’s screenshot preferences or photo settings menu.
Higher quality screenshots take up more storage space but provide clearer, more detailed images for professional use.
How to Take a Screenshot on Windows
Windows offers three main ways to capture what’s on your screen. Users can press the Print Screen key for quick full-screen captures, use the Snipping Tool for basic editing features, or try Snip & Sketch for more advanced options.
Using Print Screen
The Print Screen key provides the fastest way to take screenshots on Windows. This key sits in the top right area of most keyboards and may appear as “PrtScn” or “Print Screen.”
Full Screen Capture: Press the Print Screen key alone to copy the entire screen to the clipboard. The user must then paste the image into an app like Paint or Word to save it.
Active Window Only: Hold Alt + Print Screen to capture just the currently active window. This method ignores other open programs and focuses on one window.
Auto-Save Screenshot: Press Windows key + Print Screen to take a full screenshot that saves automatically. The screen dims briefly to confirm the capture.
The image saves as a PNG file in the Pictures > Screenshots folder. Users don’t need to paste or manually save the file with this method.
Using Snipping Tool
The Snipping Tool comes built into Windows and offers more control than Print Screen. Users can find it by typing “Snipping Tool” in the Start menu search.
Starting a Capture: Click “New” to begin taking a screenshot. The screen becomes slightly gray and the cursor changes to crosshairs.
Capture Options:
- Free-form: Draw any shape around the area to capture
- Rectangular: Click and drag to select a rectangle
- Window: Click on any window to capture it
- Full-screen: Captures the entire screen
After taking the screenshot, the Snipping Tool opens an editor. Users can draw on the image, highlight parts, or add text. The save button lets them choose where to store the file and what format to use.
Using Snip & Sketch
Snip & Sketch replaces the old Snipping Tool in newer Windows versions. It offers the same basic features plus additional editing tools.
Quick Access: Press Windows key + Shift + S to open the capture toolbar immediately. The screen dims and a small toolbar appears at the top.
Capture Types:
- Rectangle selection
- Free-form selection
- Window capture
- Full screen capture
After capturing, a notification appears in the bottom right corner. Clicking it opens the Snip & Sketch editor with more advanced tools than the basic Snipping Tool.
Editing Features: The editor includes a pen tool, highlighter, eraser, and ruler. Users can also crop the image or add text before saving.
The app automatically copies screenshots to the clipboard while also offering save options for permanent storage.
Taking a Screenshot on Mac
Mac users can capture screenshots through keyboard shortcuts or the built-in Screenshot app. Screenshots save to the desktop by default with a timestamp filename.
Using Keyboard Shortcuts
Mac offers three main keyboard shortcuts for different screenshot types. Each shortcut captures a specific area or element on the screen.
Command + Shift + 3 captures the entire screen instantly. The Mac saves the full screenshot as a file on the desktop with the current date and time.
Command + Shift + 4 lets users select a specific area to capture. The cursor changes to crosshairs, allowing users to click and drag around the desired area. The screenshot only includes the selected portion.
Command + Shift + 4 + Spacebar captures a specific window or menu. After pressing the keys, users click on any window to capture just that element with its shadow.
Users can add the Control key to any of these shortcuts to save the screenshot to the clipboard instead of the desktop. This allows immediate pasting into other applications without creating a file.
Using the Screenshot App
The Screenshot app provides more control over capture settings and timing. Users access it by pressing Command + Shift + 5 or finding it in the Applications folder.
The app displays a toolbar with capture options at the bottom of the screen. Users can choose to capture the entire screen, selected windows, or custom selections.
The toolbar includes recording options for screen videos. Users can set a timer delay of 5 or 10 seconds before the screenshot captures.
The options menu lets users change where screenshots save and what format to use. Users can also enable or disable the floating thumbnail preview.
Saving and Locating Mac Screenshots
Screenshots automatically save to the desktop with names like “Screenshot 2025-09-25 at 10.30.45 AM.png”. The timestamp shows exactly when the user took the capture.
Users can change the save location through the Screenshot app options menu. Common alternatives include the Documents folder or Pictures folder.
A small thumbnail appears in the screen corner after taking a screenshot. Users can click this thumbnail to edit the image immediately or Control-click to save it to the clipboard instead.
Screenshots save as PNG files by default, which preserves image quality. Users can change this to JPEG through Terminal commands if they need smaller file sizes.
Capturing Screenshots on Mobile Devices
Most smartphones use simple button combinations to capture screenshots, while newer devices offer gesture controls and voice commands. Screenshots automatically save to the device’s photo gallery or a dedicated Screenshots folder.
Taking Screenshots on iPhone
iPhone users can capture screenshots using different button combinations depending on their device model. Face ID models (iPhone X and newer) require pressing the Side button and Volume Up button simultaneously.
Home button models (iPhone 8 and earlier) use the Home button plus the Side button or Top button. The screen will flash white when the screenshot is taken successfully.
After capturing a screenshot, a thumbnail appears in the bottom-left corner of the screen. Users can tap this thumbnail to edit the image immediately.
iOS devices support scrolling screenshots for capturing long web pages or documents. This feature allows users to capture content that extends beyond the visible screen area.
All screenshots save automatically to the Photos app under the Screenshots album. Users can access, edit, and share these images from this location.
Taking Screenshots on Android
Android devices primarily use the Power button + Volume Down button combination to take screenshots. Users press both buttons simultaneously and hold for a few seconds until they hear a camera click sound.
Some Android phones offer alternative methods. Samsung Galaxy devices provide palm gesture controls where users swipe the edge of their hand across the screen.
Voice commands work on certain Android models. Users can say “Take a screenshot” to capture the screen without using buttons.
After taking a screenshot, editing options typically appear on screen immediately. Users can crop, annotate, or share the image right away.
Android screenshots save in a dedicated Screenshots folder within the device’s gallery app. Samsung devices may save screenshots to Google Photos instead of the default gallery.
Using Assistive Tools on Mobile
Assistive Touch on iPhone provides an on-screen button for users who have difficulty pressing physical buttons. This feature creates a virtual button that can trigger screenshot functions.
Android’s Accessibility Menu offers similar functionality. Users can enable this feature in Settings to access screenshot options through on-screen controls.
Voice control features help users with mobility limitations. Both iPhone and Android support voice commands for taking screenshots when accessibility settings are enabled.
Third-party apps can provide additional screenshot tools and editing features. These apps often include advanced annotation tools and cloud storage options.
How to Screenshot in Web Browsers
Most modern web browsers have built-in screenshot tools that make capturing web pages simple. Browser extensions also provide additional features for taking full-page screenshots.
Browser Shortcut Tips
Microsoft Edge includes a web capture tool that users can access through the browser menu. Users click the three dots (…) in the upper-right corner to open “Settings and more.” The web capture option appears in this menu.
Chrome offers screenshot capabilities through its developer tools. Users press F12 or right-click and select “Inspect” to open developer tools. They then press Ctrl+Shift+P (Windows) or Cmd+Shift+P (Mac) to open the command menu.
Firefox users can right-click on any webpage to see a “Take Screenshot” option. This feature captures either the visible area or the entire page.
Safari on Mac supports full-page screenshots through its Develop menu. Users must first enable the Develop menu in Safari preferences, then select “Capture Full Size Screenshot.”
Using Browser Extensions
Browser extensions provide more advanced screenshot features than built-in tools. Popular options include Nimbus Capture, Full Page Screen Capture, and Awesome Screenshot.
These extensions typically add a camera icon to the browser toolbar. Users click this icon to access different capture modes like visible area, full page, or selected region.
Most extensions allow users to edit screenshots before saving. They can add arrows, text boxes, or highlights to mark important information.
Extensions often save screenshots directly to cloud storage services. This makes sharing captured images easier across different devices and platforms.
Editing and Annotating Screenshots
Most screenshots need some editing before sharing. Users can crop images, add text, draw shapes, and highlight important areas using built-in tools or third-party apps.
Basic Editing Tools
Windows users can access the Snipping Tool or Snip & Sketch for basic screenshot editing. These tools allow cropping, resizing, and simple annotations.
Mac users have Screenshot Markup built into their system. They can access it by taking a screenshot and clicking the thumbnail that appears.
Common editing features include:
- Cropping unwanted areas
- Resizing images
- Rotating pictures
- Adjusting brightness or contrast
Mobile devices offer similar tools. Android phones typically include a basic editor after taking screenshots. iPhone users can tap the screenshot thumbnail to open markup tools.
Third-party apps like Markup Hero provide more advanced features than built-in tools. These apps work across different devices and offer cloud storage options.
Highlighting and Markup Options
Annotation tools help users point out specific details in screenshots. They can add arrows, circles, rectangles, and text boxes to draw attention to important information.
Popular markup options include:
- Arrows – Point to specific elements
- Text boxes – Add explanations or labels
- Shapes – Circle or box important areas
- Highlighter – Mark text or sections
- Pen tools – Draw freehand annotations
Most annotation tools offer different colors for markup elements. Red arrows grab attention for urgent items. Yellow highlighting works well for text selection.
Users can combine multiple annotation types on one screenshot. They might add an arrow pointing to a button, then include a text box with instructions nearby.
Saving, Sharing, and Managing Screenshots
After taking a screenshot, users need to organize their files and share them with others. Proper file management prevents clutter while understanding platform-specific sharing methods ensures screenshots reach their intended audience.
Organizing Screenshot Files
Windows automatically saves screenshots to the Pictures folder under a Screenshots subfolder. Users can change this default location by right-clicking the Screenshots folder and selecting Properties, then Location.
Creating a custom folder system helps keep screenshots organized. Users should create folders by date, project, or purpose. For example:
- Work screenshots
- Gaming captures
- Error messages
- Tutorials
Most screenshot tools let users choose where to save files. The Snipping Tool allows users to pick the save location each time. Users can also set up automatic naming with dates and times.
File naming matters for easy searching later. Instead of keeping default names like “Screenshot_20250925,” users should rename files with descriptive titles like “Login_Error_Chrome” or “Budget_Spreadsheet_Final.”
Regular cleanup prevents storage issues. Users should delete old screenshots they no longer need. Setting monthly reminders helps maintain an organized system.
Sharing Screenshots on Different Platforms
Email sharing works for most screenshot formats. Users should compress large images or use PNG format for better quality. Most email providers accept files up to 25MB.
Social media platforms have different requirements:
- Twitter/X: Supports PNG, JPEG up to 5MB
- Facebook: Accepts most formats under 4MB
- Instagram: Requires square or vertical images
- LinkedIn: Works best with PNG format
Cloud storage offers easy sharing options. Users can upload screenshots to Google Drive, Dropbox, or OneDrive, then share the link. This method works well for large files or multiple screenshots.
Instant messaging apps like Discord, Slack, or Teams accept drag-and-drop screenshots. Users can paste directly from the clipboard using Ctrl+V in most chat applications.
For work environments, users should check company policies about screenshot sharing. Some organizations require specific platforms or have security restrictions.
Troubleshooting Screenshot Issues
Screenshot problems usually happen when system settings block the function or background programs take control of the Print Screen key. Users can fix most issues by checking permissions and restarting key Windows processes.
Common Screenshot Problems
The Print Screen key may stop working when background programs take control of it. OneDrive, Dropbox, and other cloud storage apps often override the default screenshot function.
Windows Explorer crashes can also break screenshot tools. When this happens, the Snipping Tool and other built-in programs won’t work properly.
Some users find that their screenshots save to unknown locations. This occurs when apps change the default save folder without telling the user.
Permission errors prevent screenshots in certain programs. Some apps block screen capture for security reasons. Games and video players often have this protection.
Hardware problems with the Print Screen key can cause issues too. Sticky keys or damaged keyboards make it hard to take screenshots using keyboard shortcuts.
Fixing Errors and Permissions
Restart Windows Explorer to fix most screenshot problems. Press Ctrl + Shift + Esc to open Task Manager. Find “Windows Explorer” in the list and click “Restart.”
Check which programs control your Print Screen key. Open OneDrive settings and turn off automatic screenshot saving. Do the same for Dropbox and similar apps.
Reset screenshot permissions by running Windows as an administrator. Right-click the Start button and select “Windows PowerShell (Admin).” This gives full access to screenshot functions.
Try the Snipping Tool if Print Screen doesn’t work. Type “Snipping Tool” in the Start menu to open it. This program works even when keyboard shortcuts fail.
Update your display drivers if screenshots appear black or corrupted. Go to Device Manager and update graphics card drivers to fix display issues.
Advanced Screenshot Techniques
Users can capture entire web pages that extend beyond their screen and set up automated screenshot workflows using specialized tools. These methods go beyond basic screen capture to handle complex screenshot needs.
Capturing Scrolling Screenshots
Standard screenshots only capture what appears on screen. Scrolling screenshots capture entire web pages or documents that extend beyond the visible area.
Browser Extensions offer the easiest solution. Extensions like Full Page Screen Capture for Chrome automatically scroll and stitch together a complete page image. Users simply click the extension icon and wait for the capture to complete.
Built-in browser tools provide another option. Firefox includes a screenshot tool that captures full pages. Users access it through the developer tools or by typing “screenshot” in the address bar.
Third-party software handles scrolling in any application. Tools like Snagit detect scrolling content and prompt users to continue scrolling while capturing. The software combines all sections into one image.
Mobile apps also support scrolling screenshots. Samsung phones include a “Scroll capture” option after taking a regular screenshot. iPhone users need third-party apps like Tailor to stitch multiple screenshots together.
Automating Screenshots with Third-Party Tools
Automated screenshots save time for users who need regular captures. Third-party tools provide scheduling and batch capture features that built-in tools lack.
Snagit offers timed captures and batch processing. Users can set intervals for automatic screenshots or capture multiple windows in sequence. The software saves files with custom naming patterns.
Greenshot provides hotkey automation and workflow integration. Users can configure custom shortcuts for different capture types and automatically send screenshots to specific folders or applications.
ShareX combines automation with advanced editing. The tool can capture screenshots based on timers, upload them automatically to cloud services, and apply watermarks or annotations without user input.
Command-line tools enable scripted automation. Windows PowerShell and third-party utilities can trigger screenshots through scheduled tasks or batch files for system administrators.