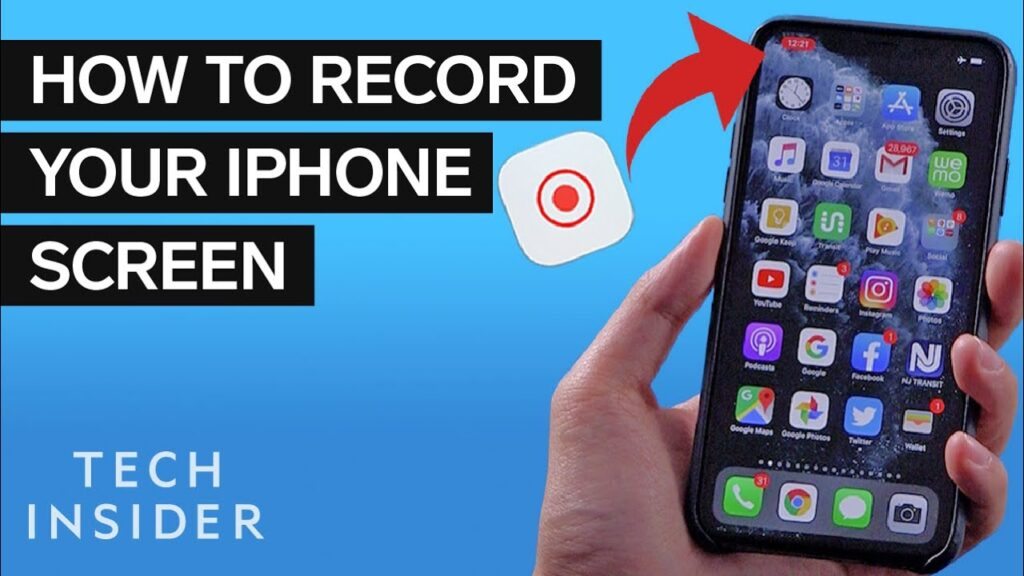
Screen recording makes it simple to capture what happens on your phone, whether you want to save a tutorial, share gameplay, or walk someone through an app. You can record your screen directly on most modern Android devices and iPhones without needing extra apps. This built-in feature gives you a quick way to create videos that you can save, edit, or share.
You’ll see how Android and iPhone handle screen recording in slightly different ways, but both give you easy tools to get the job done. Beyond the basics, you can also improve your recordings with audio, editing options, or third-party apps if you need more features.
By learning how to use the tools already on your phone, you’ll be ready to capture clear and useful recordings anytime you need them. This guide will walk you through the steps, show you how to enhance your videos, and help you choose the right method for your needs.
Understanding Screen Recording on Phones
Screen recording lets you capture video of what happens on your phone screen, while screenshots save still images. You can use both tools for different purposes, from creating tutorials to saving information quickly. Knowing the difference helps you choose the right option for your needs.
What Is Screen Recording?
Screen recording is a built-in feature on most modern smartphones that allows you to capture everything displayed on your screen in real time. Unlike a screenshot, which only takes a single image, a screen recording creates a video file.
This video can include movements, scrolling, and app activity. On many phones, you can also turn on the microphone to record your voice at the same time. Some devices even let you capture system audio, such as music or video sound.
You usually start a screen recording through the Quick Settings panel on Android or the Control Center on iPhone. Once activated, your phone saves the recording as a video file in your gallery or photos app.
A screen recording is especially useful when you want to show steps instead of explaining them with words. It acts as a live capture of your phone’s actions.
Common Uses for Screen Recording
You can use screen recording in many practical ways. Some of the most common include:
- Tutorials and guides: Show someone how to use an app or feature step by step.
- Saving content: Capture short clips from apps or social media when downloading isn’t possible.
- Troubleshooting: Record an issue on your phone so you can share it with tech support.
- Presentations: Demonstrate features or workflows for school or work.
Screen recording can also help you keep a record of temporary information, such as disappearing messages or live streams.
Because screen recordings save as video files, they take up more storage than screenshots. It’s a good idea to manage your recordings and delete ones you no longer need.
Screen Recording vs. Screenshot
A screenshot captures a single still image of your screen, while a screen recording captures a video. Both tools are useful, but they serve different purposes.
| Feature | Screenshot | Screen Recording |
|---|---|---|
| Format | Image | Video |
| Captures | One moment | Continuous action |
| File size | Small | Larger |
| Best for | Quick saves | Tutorials, demos |
Screenshots are faster and lighter, making them ideal for saving text, images, or quick references. Screen recordings, on the other hand, are better when you need to show a process or capture motion.
Choosing between the two depends on whether you need a single frame or a full sequence of actions. Both are built-in tools that make your phone more versatile.
How to Record Screen on Android Devices
Most Android phones running version 11 or later include a built-in screen recorder. You can start recording from the quick settings panel, adjust audio options, and later find the saved files in your phone’s internal storage.
Using the Built-In Screen Recorder
Android’s built-in screen recorder lets you capture video without installing extra apps. This tool records your screen activity and can also include audio if you choose.
When you start recording, you usually see options for:
- Device audio (captures sounds from apps or media)
- Microphone (captures your voice or surroundings)
- Both audio sources
- No audio
You may also enable visual indicators for touches. This helps when showing gestures or explaining steps. Once you confirm your choices, tap Start and a short countdown begins before recording starts.
Stopping the recording is simple. Swipe down from the top of the screen, then tap Stop in the notification area. The video will then save automatically to your device.
Accessing the Quick Settings Panel
The screen recorder is located in the quick settings panel. This panel appears when you swipe down from the top of your screen. Some devices require you to swipe down twice to see the full set of tools.
If you don’t see the screen recorder right away, you may need to add it. On Samsung phones, tap the three-dot menu and select Edit Buttons. Drag the Screen Recorder button into the active panel.
On Google Pixel and many other devices, tap the pencil icon to edit quick settings. Find the Screen Record tile and drag it into the top section. After saving, you can access it anytime with a single swipe.
This setup ensures you can start recording quickly without searching through menus.
Saving and Locating Your Recordings
Screen recordings are stored in your phone’s internal storage. The exact folder can vary by device.
- On Samsung Galaxy phones, recordings usually save in the Screen Recordings folder.
- On Google Pixel devices, they often go to the Movies folder.
- Third-party apps like AZ Recorder may create their own folders, such as AzScreenRecorder.
You can find these files using the Gallery app, Google Photos, or a file manager. If you plan to share or edit recordings, knowing the storage location helps you access them faster.
Recordings are saved as video files, usually in MP4 format, which makes them easy to play or transfer.
How to Record Screen on iPhone
You can use the built-in screen recording tool on your iPhone to capture video of what’s happening on your screen. The feature lets you record with or without audio, and all recordings save directly to the Photos app for easy access.
Enabling Screen Recording in Control Center
Before you can start recording, you need to make sure the Screen Recording button is available in the Control Center. Open the Settings app, then tap Control Center.
Scroll down to the More Controls section. Find Screen Recording and tap the green + icon. This moves it to the Included Controls list.
Once added, you can access it anytime by swiping down from the top-right corner of your screen. You do not need to repeat this setup again unless you remove it.
This step is important because without enabling the control, the recording option will not appear in the Control Center.
Recording Your Screen on iPhone
To begin recording, open the Control Center by swiping down from the top-right corner. Tap the record button (a circle with a dot inside). A 3-second countdown appears before the recording starts.
If you want to include your voice or outside sounds, press and hold the record button, then tap the Microphone icon to turn it on. This allows you to capture both screen activity and audio at the same time.
While recording, a red status bar or red pill-shaped icon shows at the top of your screen. To stop, tap that red indicator and confirm by selecting Stop.
The recording automatically saves to your Photos app. You don’t need to manually save or export it at this stage.
Managing and Sharing Recordings
After stopping the recording, go to the Photos app to view it. From here, you can trim the beginning or end by tapping Edit and adjusting the sliders. This is useful if you want to remove extra seconds before or after the main content.
You can also share the recording directly from Photos. Tap the Share icon and choose from options like Messages, Mail, AirDrop, or social apps.
If you need the file on another device, you can upload it to iCloud Drive, send it through AirDrop, or transfer it with a cable.
Managing recordings this way keeps your videos organized and ready to use without additional apps or tools.
Enhancing Your Screen Recordings
Improving your recordings depends on controlling video quality, managing audio sources, and adjusting how your selfie video appears on the screen. Paying attention to these details helps you create clips that are easier to watch, clearer to hear, and more useful for the purpose you have in mind.
Adjusting Video Quality Settings
The sharpness and smoothness of your recording depend on resolution, bitrate, and frame rate. Most phones record at the device’s native resolution, such as 1080p or higher. Always pick the highest resolution available to avoid blurry results.
Bitrate affects file size and clarity. A higher bitrate produces cleaner motion but uses more storage. For everyday tutorials, 12–16 Mbps is usually enough. For gaming or fast movement, 20 Mbps or more gives better results.
Frame rate impacts how smooth the video looks. Use 30 FPS for apps or instructions. Switch to 60 FPS if you want smoother playback for games or fast scrolling.
Here’s a quick reference:
| Use Case | Resolution | Bitrate | Frame Rate |
|---|---|---|---|
| Tutorials | 1080p | 12–16 Mbps | 30 FPS |
| Gaming | 1080p+ | 20–24 Mbps | 60 FPS |
| Social Media | 1080p | 8–12 Mbps | 30 FPS |
Recording Internal and External Audio
Audio is just as important as video quality. You can choose between recording only the phone’s internal sounds, only your microphone, or both together.
To capture internal audio, select “Device audio” on Android or keep the microphone off on iPhone. This records app sounds, music, or gameplay without background noise.
To capture external audio, turn on the microphone. This allows you to narrate while recording. On iPhone, press and hold the record button in Control Center and toggle the microphone. On Android, choose “Device audio and microphone” if you want both system sounds and your voice.
Test your setup before recording a long session. This ensures your voice is clear and balanced with the device audio.
Customizing Selfie Video Size
Adding a selfie video box can make your screen recording more personal. This is useful for tutorials, reactions, or presentations where your face helps explain the content.
Most third-party apps let you resize and move the selfie video. Keep it small enough so it doesn’t cover important parts of the screen but large enough for viewers to recognize expressions.
A common setup is placing the selfie box in a corner. You can adjust size depending on the purpose:
- Small (10–15%) of screen width for tutorials.
- Medium (20–25%) for reactions or commentary.
- Large (30%+) only if your face is the main focus.
Experiment with placement and size until the balance feels right for your content.
Using Third-Party Screen Recorder Apps
Third-party screen recorder apps give you more control over video quality, audio sources, and editing compared to built-in tools. They are useful when you need higher frame rates, advanced customization, or extra features like face-cam support and drawing tools.
Popular Apps: AZ Screen Recorder and XRecorder
Two of the most widely used apps are AZ Screen Recorder and XRecorder. Both are free to download, with optional upgrades for more features.
AZ Screen Recorder lets you set resolution from 240p up to 1080p, choose bitrates, and record at frame rates as high as 144 FPS. You can also capture internal audio, add countdown timers, and even create time-lapse recordings.
XRecorder offers similar flexibility but adds a built-in paint tool so you can draw on the screen during recording. It also supports recording with your front camera overlay, which is useful for tutorials or commentary. You can adjust resolution and frame rate, with support up to 1080p and 60 FPS in the free version.
Both apps are trusted by many users and continue to receive updates, making them reliable choices if you want more than the default recorder.
Advanced Features and Customization
Third-party apps often include tools that go beyond simple screen capture. For example, you can:
- Adjust recording quality: Change resolution, frame rate, and bitrate to balance video clarity with file size.
- Add overlays: Place a face-cam window or watermark on your video.
- Edit recordings: Trim clips, merge videos, or replace audio without leaving the app.
- Control recording methods: Stop or pause by shaking your device or turning the screen off.
These options help you tailor recordings to your needs. A gamer might prefer higher frame rates, while a teacher may value annotation tools and face-cam support. Having these settings in one place saves you from needing extra apps to edit or finalize your recordings.
When to Use Third-Party Apps
You should use a third-party screen recorder when the built-in tool feels too limited. For example, if you want to record at higher FPS, add commentary with a face-cam, or remove watermarks, apps like AZ Screen Recorder and XRecorder are better choices.
They are also more flexible for professional use. If you create tutorials, gameplay videos, or presentations, you will benefit from advanced editing, audio mixing, and export options.
However, if you only need quick, simple recordings, the built-in Android screen recorder may be enough. Third-party apps are best when you need more control and features to match your specific use case.