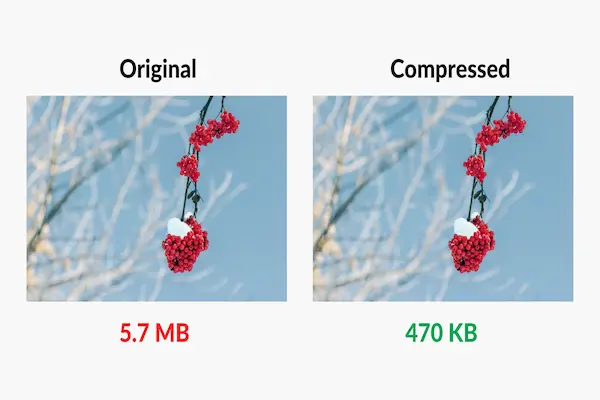
Learn how to compress photos easily to reduce the file size without losing the image’s clarity or detail.
The key is to use tools or methods that optimize the image by removing unnecessary data while keeping the visible quality intact.
This allows your photos to load faster online and save space without appearing blurry or pixelated.
You can compress images using various options like built-in apps on Windows and Mac, or reliable online tools that balance size and quality.
Understanding how compression works helps you choose the right method for your needs and avoid over-compressing, which can harm your image quality.
Knowing how to compress photos effectively is important for improving website speed, sharing images easily, and managing storage.
This guide will show you practical ways to shrink your photos without ruining how they look.
Understanding Photo Compression and Image Quality
Photo compression reduces file size so images load faster and take less space. You need to know how compression works, the types of compression, and what changes happen to the image quality to do this well.
How Image Compression Works
Image compression shrinks the file by removing data that your eye might not notice. It uses math algorithms to store the image more efficiently. This means the compressed image looks very close to the original but uses fewer bytes.
Compression removes repeated or unnecessary details. Some methods keep all information, while others remove some data that seems less important. Your goal is to keep the important details, like sharp lines and colors, while trimming excess data.
For example, JPEG compression reduces file size by simplifying complex image areas. This lets web pages load faster but can lose some detail if you compress too much.
Lossy vs. Lossless Methods
You have two main options: lossy and lossless compression.
Lossy compression cuts out data permanently to make files smaller. JPEG is a common lossy format. It can reduce size a lot but might cause slight blurriness or color changes if compressed too much.
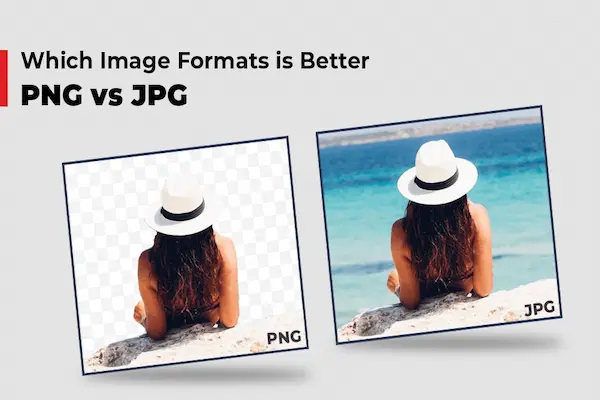
Lossless compression shrinks files without losing any data. PNG is a popular lossless format. It keeps every pixel exactly the same, so the image looks identical to the original but doesn’t reduce file size as much as lossy methods.
Use lossless when preserving absolute quality is vital, like logos or graphics with transparency. Choose lossy for photos where smaller size matters more than perfect detail.
Impact on Visual Quality
Compression affects how your image looks. Too much compression can cause visible flaws like blurriness, pixelation, or color shifts.
When using JPEG compression, lowering the quality setting too much can create “artifacts.” These include blocky areas or banding in smooth color gradients. These artifacts distract from the image’s original clarity.
Lossless compression keeps quality intact so the image remains sharp. But lossless files are often bigger, which can slow loading or use more storage.
Balancing file size and image quality means adjusting settings carefully. Use moderate compression levels and preview results to avoid ruining your photo’s appearance.
Choosing the Right File Format for Compression
Selecting the correct file format affects both the file size and the visual quality of your images. Some formats compress better but lose detail, while others keep all the original data, which makes files larger. Understanding differences between similar formats and when to use each can help you keep your photos sharp without wasting storage.
JPEG and JPG Differences
JPEG and JPG are basically the same format. The only difference is the file extension: JPEG uses four letters, while JPG uses three. This difference originated from older Windows systems that required three-letter file extensions.
Both JPEG and JPG files use lossy compression, which reduces the file size by removing some image data. This makes them suitable for photographs and images with gradients but less ideal for graphics with sharp edges or text.
You can use a JPG compressor or JPEG compressor to reduce file size, but be cautious. Over-compressing will cause visible quality problems such as blurring and artifacts.
Advantages of JPEG Files
JPEG files balance quality and file size well. They compress images efficiently, often reducing file size by 10 times without visually affecting the image much. This makes JPEG perfect for web use and sharing photos online.
Their wide compatibility across devices and software means you can open JPEG images almost anywhere. JPEG supports millions of colors, so your photos keep rich details and smooth color shifts.
Because JPEG files are small yet detailed, they speed up webpage loading times and save storage space, which benefits both website owners and users.
When to Use JPEG Format
Use JPEG format when you need smaller file sizes but can tolerate some quality loss, like for web photos, social media, and email. It’s best for images with lots of color and soft edges, such as landscapes or portraits.
Avoid JPEG for images with text, logos, or transparent backgrounds. These need formats like PNG or TIFF that preserve sharp edges and transparency without loss.
When saving JPEG files, set the compression quality between 75 and 85 percent for a good balance. This keeps images looking clear while reducing file size efficiently.
Best Techniques to Compress Images Without Losing Quality
To compress images effectively, focus on preparing your files carefully, choosing the right compression level, and resizing your images properly. These steps help keep your photo sharp while lowering its file size.
Optimizing Images Before Compression
Start by cleaning your image file. Remove unnecessary metadata, such as camera details or location tags, which do not affect visuals but increase file size.
Choose the right file format. Use PNG or TIFF if you want lossless compression, preserving every detail. For photos, JPEG is suitable if you set quality carefully.
Use software or online tools that support advanced compression like TinyPNG or Adobe Photoshop. These tools reduce file size by removing invisible or redundant data but keep the image clear.
Make sure your original image is high quality. Compressing a low-quality photo won’t improve it and will often highlight flaws or artifacts.
Adjusting Compression Settings
When compressing JPEG images, adjust the quality level between 70% to 85%. This range often balances good visual quality and significantly reduced file size.
Avoid maximum compression, which can cause artifacts like blurriness, pixelation, and banding. Test different settings to find a sweet spot for your specific image.
If your software allows, choose progressive compression. This helps images load faster online while keeping quality steady.
You should also consider newer formats like WebP or JPEG 2000. They provide better quality at smaller sizes compared to standard JPEG.
Properly Resizing Images
Resize your images to the exact dimensions needed for display. Oversized images increase file size and loading time without visible benefits.
Maintain the aspect ratio to avoid stretching or squashing your photo. Use editing tools that let you set precise width and height values.
Lower resolution images compress smaller but can lose important details if made too small. Aim for a size that matches your platform or usage requirements.
By resizing first and then compressing, you avoid losing quality that happens when shrinking images after compression.
Tools and Software for Efficient Photo Compression
Choosing the right tools can make compressing your photos easier while keeping quality intact. Some options work best online, others offer professional-grade features, and a few operate directly in your browser for quick tasks. Knowing how each type functions helps you pick the best solution for your needs.
Online Image Compressors
Online compressors are easy to use and require no installation. You upload your photos, choose compression settings, and download the optimized files. Tools like JPEG Optimizer let you compress JPEG images with control over quality and file size. Some also offer batch processing for multiple files.
These tools often support common formats like JPEG and PNG but may have limits on file size or the number of images per session. Since files are uploaded to servers, check whether the tool guarantees privacy and does not store your data.
Online compressors are great for quick jobs or when you don’t have access to specialized software.
Professional Software Solutions
Professional software like Photoshop or JPEGmini offers advanced control over photo compression without quality loss. Photoshop lets you adjust export settings carefully, combining resizing and compression to optimize images.
JPEGmini uses smart compression to reduce JPEG file size by up to 80% while keeping detail sharp. These programs also support batch processing and integrate with editing workflows, saving you time if you handle many images regularly.
You pay for these tools but get more customization, faster batch work, and plugins that work with popular editing programs like Lightroom and Capture One.
Browser-Based Tools
Browser-based tools run completely on your device without uploading files to the internet. For example, Aftershoot Converter compresses JPEG, PNG, and TIFF images locally for privacy and speed.
These tools often support batch processing and work on any operating system since they run in modern browsers. They are free and require no installation, ideal for privacy-conscious users who want lossless compression without complicated setups.
While they may not support RAW formats yet, browser-based tools give you a fast, secure option for compressing photos directly on your device.
Avoiding Common Mistakes and Ensuring Quality
You need to carefully manage compression settings to keep image quality high. Paying attention to how much you compress, preserving the image’s dimensions, and preventing repeated saving are key to avoiding quality loss.
Preventing Over-Compression
Over-compression happens when you reduce an image’s file size too much. This causes visible damage like blurriness, pixelation, and unwanted artifacts. These problems happen because the compression removes too much visual data.
To avoid this, set your compression level carefully. For JPEGs, try keeping quality settings above 70-80%. Lossless formats, like PNG, prevent quality loss but may have larger files.
Using tools with preview options helps you see quality changes in real time. Always balance smaller file sizes with acceptable visual detail. Avoid pushing compression too far just to save space.
Maintaining Aspect Ratio
Changing an image’s width or height without keeping the aspect ratio distorts the photo. It makes images look stretched or squished, which damages how they appear and can confuse viewers.
Always use software or settings that lock the aspect ratio when resizing. This keeps the image’s proportions correct.
If you need a specific size, crop first to the correct ratio, then resize. That way, you avoid distortion while compressing.
Avoiding Generational Loss
Every time you save a lossy compressed image, like a JPEG, quality drops a bit. This is called generational loss. Repeatedly opening and saving the same file makes the damage worse.
To prevent this, keep an original copy in a lossless format (PNG or TIFF). Do all your editing on that file first. Only save as JPEG or compressed format once, at the end.
If you must edit multiple times, use software that supports non-destructive editing. This reduces repeated quality loss and keeps your images sharp.