Sharing photo albums makes it easy to let your friends and family see your memories no matter where they are. Whether you want to share vacation shots, family gatherings, or everyday moments, you can do it quickly using your phone or computer. The best way to share photo albums is by using simple tools that let you create an album, invite people to view or contribute, and control who has access.
With options like Shared Albums on iPhone or Google Photos, you don’t need to worry about file sizes or complicated steps. These tools allow you to add photos and videos, invite others to join, and even let them add their own content if you want. You’ll get notifications when new photos are added, keeping everyone connected and up to date.
Sharing albums online not only saves space on your device but also keeps your memories safe in the cloud. You can easily manage who sees your photos and remove access if needed, offering control and flexibility. Once you know the steps, sharing becomes a seamless part of how you keep your photos alive with others.
Understanding Shared Photo Albums
Sharing photo albums allows you to easily connect with others by giving them access to your pictures and videos. You control who can see, add, or comment on the shared content. This makes it easier to organize memories with family and friends while keeping control over your photos.
What Are Shared Albums?
Shared albums are collections of photos and videos you create to share with specific people. You invite others to view the album and, if allowed, they can add their own photos and videos.
These albums sync across devices like Macs, iPhones, iPads, and even Windows computers through iCloud. When you add new content, subscribers get notified. You have options to control who can post and comment, making shared albums interactive.
The albums work through cloud services, which means you don’t need to send files individually. Everyone invited can see the latest updates in one place.
Benefits of Sharing Photo Albums
Shared albums make it simple to gather and share moments with a group. You don’t have to send large files or use third-party apps. When you add photos and videos, all invited people see the updates automatically.
If others add photos, everyone can enjoy the complete collection. Shared albums also make it easy to comment on photos, creating a space for memories and conversations.
You can save photos added by others to your own library, so you keep important images even if they are later removed from the album. Plus, you can invite people who don’t use iCloud by enabling a public website link.
Privacy and Accessibility Considerations
You decide exactly who can join your shared album. Only the people you invite can see the album unless you turn on the public website option, which allows anyone with the link to view it.
You control permissions such as who can post photos or comment. If needed, you can remove subscribers at any time to restrict access.
Shared albums sync through iCloud, so you need to be signed in and updated on your devices. Be aware of storage and file type limits set by the service to avoid issues while sharing.
Always save any photos you want to keep before deleting a shared album, as removing it deletes the album and its content for all subscribers.
How to Share Photo Albums Using the Photos App
You can organize your pictures into albums and share them easily with others using the Photos app. Sharing lets you invite people to view, add, or comment on your photos, while you control who has access and what they can do.
Creating Albums in the Photos App
First, open the Photos app on your device. Tap the Albums tab at the bottom of the screen. Then, tap the Add button or Create to start a new album.
Give your album a clear, descriptive name.
Next, select the photos and videos you want to include. You can browse your library and choose multiple items before confirming the selection. This allows you to gather all related images in one place before sharing.
Using albums helps you keep your photos organized and makes it easier to share specific groups of images, such as for events or trips.
Steps to Share Albums
To share an album, open the album you created. Tap the Share button, then select Add to Shared Album if the album is not already shared.
If you don’t have a shared album yet, you can create one during this step by naming it and inviting people.
Add contacts by selecting them from your list or typing email addresses or phone numbers.
When you add photos or videos to a shared album, participants get a notification automatically.
You can also turn on a Public Website option to let people who don’t use the Photos app view your album online.
Controlling Permissions for Shared Albums
As the album owner, you control who can view and interact with your shared album.
Go to the shared album, tap the More or Shared Album Details button, then look for Participants.
From here, you can add or remove people at any time.
You can also decide if participants can add photos and videos by turning on or off the Subscribers Can Post setting.
Only you and the invited participants can see the album unless you enable public sharing.
If needed, you can delete the shared album, which removes it from all participants’ devices and any online link.
Sharing Photo Albums with OneDrive
You can organize your photos into albums, upload them to OneDrive, and easily control who can see or edit the content. OneDrive offers clear steps for setting up your account, creating albums, and enabling multiple users to collaborate securely.
Setting Up OneDrive for Photo Sharing
First, make sure you have a Microsoft account and OneDrive installed on your device. OneDrive comes pre-installed on Windows 10 and 11, but you can also download it on other operating systems or use the web version.
Sign in to OneDrive with your Microsoft account. You will get free storage of 5 GB, which is usually enough for many photos. If you need more space, consider upgrading to OneDrive Personal, which offers 1 TB of storage.
Create a folder named for your photo albums in the OneDrive Pictures folder. Upload your images by dragging and dropping into this folder from your computer or mobile device. You can also manage photos through the OneDrive app on your phone, which lets you select and upload pictures manually.
Creating and Sharing Albums on OneDrive
To create an album, open your OneDrive Photos section and select the pictures you want to include. OneDrive lets you combine photos from different folders into one album, which you can name for easy retrieval.
Once your album is ready, use the “Share” button. Share by entering email addresses directly or create a shareable link. You can set permissions to allow others to view only or edit the album. You can also add expiration dates or passwords for extra security.
Sharing a link makes it easy to send the album through email, messages, or social media while keeping control over who can access your photos.
Collaborative Features of Shared Albums
Shared albums in OneDrive allow multiple people to add, edit, or view photos within the same album. If you grant editing permission, collaborators can upload their own photos, making it useful for family events or group projects.
You can track who has access to your shared albums at any time. OneDrive also notifies you when someone adds or modifies photos, helping maintain transparency.
If you want to keep your albums organized, you can allow others to contribute without losing control by requiring approval or managing permissions regularly. This way, your album stays curated even when shared across accounts.
How to Share Photo Albums Across Different Devices
You can share photo albums smoothly between phones, tablets, and computers. It often requires using apps or cloud services that work across those devices. Some methods let you share with people who do not use the same apps.
Sharing Between Computers and Mobile Devices
To share between computers and mobile devices, use apps like the Photos app on Mac or OneDrive on Windows and mobile. Both let you create albums and sync them across devices. Upload photos on one device, and they appear on the other automatically.
For example, if you use OneDrive, upload your album on your PC. Then, open the OneDrive app on your phone to access or share it. The Photos app on Mac and iPhone also offers Shared Albums, where members can add photos and comments.
Make sure you sign in with the same account on all devices to sync albums correctly. This keeps your albums updated, no matter the device you use.
Cross-Platform Album Compatibility
Sharing photo albums works best with cloud services that support multiple platforms, like OneDrive or Google Photos. These services work on Windows, macOS, iOS, and Android.
By using cloud platforms, your recipients can view albums on their preferred device without needing specific software. The albums stay organized and can be edited or added to by everyone allowed to access them.
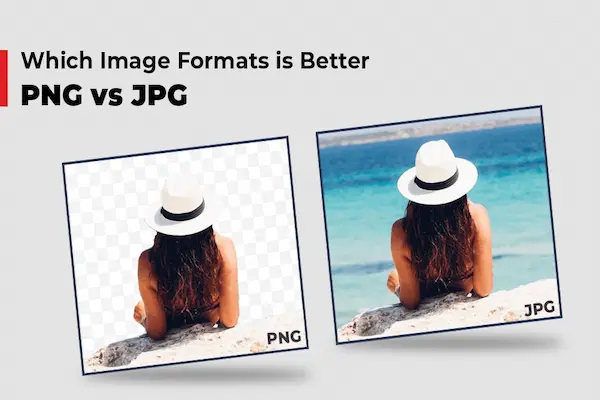
Remember to check file formats; most standard image types (JPEG, PNG) are supported everywhere. Avoid formats that might not be compatible with all devices.
Sending Album Links to Non-Users
If the people you want to share with don’t use apps like OneDrive or Photos, you can still share albums by sending links.
Most cloud services allow link sharing. You create a shared album online and generate a URL. Send this link by email, text, or messaging apps.
Anyone with the link can view the album on a web browser, even if they don’t have the app or account.
You can control permissions to decide if they just view the album or if they can add photos and comments too. This option makes sharing easy for everyone.
Inviting and Managing Contributors in Shared Albums
You can invite others to view and add photos to your shared albums. Managing contributors helps you control who can participate and how you get notified about album activity.
Sending Invitations to Collaborate
To invite people, open the shared album and tap the People icon. Enter the contacts’ names or email addresses. They will receive an invitation allowing them to view and add photos.
Make sure the invitees have compatible accounts, such as iCloud for Apple users or OneDrive for Microsoft users, if you are using cross-platform sharing. Accepting an invite usually requires just tapping a link or notification.
You can send invitations when you create the album or anytime afterward. This process lets you easily add friends, family, or colleagues to contribute on the go.
Adding and Removing Contributors
You control who can join your shared album. To add more people, open the album’s settings and invite additional contacts.
Removing contributors is also simple. In the album settings, tap the person you want to remove and select Remove Subscriber or a similar option. Removed users lose access to the shared album.
Keep track of contributors to maintain privacy and manage content quality. You decide if participants can add comments or only view photos.
Managing Notifications and Activity
Notifications alert you when contributors add photos or comments. You can turn notifications on or off from the shared album’s People settings.
If the album becomes too active, you might want to silence alerts to avoid distractions. You still have access to new content anytime by opening the album.
You can also choose which activities to get notified about, such as new photos, comments, or changes in contributor status. This helps you stay updated without receiving unnecessary alerts.
Editing and Organizing Shared Albums
You can control which photos appear in your shared albums and how they are arranged to make the best impact. Managing the photos effectively helps keep your album clear and meaningful for everyone invited.
Adding or Removing Photos
To add photos, select the images you want to include from your library, then share them directly to the album using the Photos app. You can also drag photos into the shared album on your Mac.
Removing photos is similar. Open the shared album, select the photo or video you want to delete, then use the delete option. When you remove an item, it disappears for all subscribers.
Be aware that if you delete a shared album, its photos are removed permanently from everyone’s devices unless they saved copies to their own libraries. Subscribers can usually remove only the photos they added unless you give them permission to post and manage content.
Album Naming and Covers
When creating a shared album, you choose its name. Pick a clear, descriptive title so everyone knows what the album is about. You can change the name later by going into the album’s settings.
The album cover is the photo that appears first to represent the entire album. It is automatically set to the newest added photo, but you can manually change it. Just move the photo you prefer to the front or select it within album settings if your app allows.
A good cover photo helps others easily recognize the album, especially when you have many shared albums.
Organizing Photos for Better Storytelling
Arrange photos in a way that tells a clear story. You can reorder photos by dragging them in the album sidebar or grid view, depending on your device.
Group similar photos together by event, date, or theme to make viewing easier. Use simple captions or comments on photos to add context or details for your viewers.
Limiting the number of photos per event or trimming duplicates can keep the album focused. This also helps avoid overwhelming those you share with.
Troubleshooting Shared Album Issues
You may encounter problems when sharing photo albums, such as errors, permission blocks, or syncing delays. These can stop your shared album from working as expected. Knowing how to fix these issues will help you keep your photos accessible to others without hassle.
Common Sharing Errors
Sometimes, shared albums won’t appear because the feature is turned off. Check that Shared Albums is enabled in your Photos app settings on your device. Also, a poor internet connection can stop albums from loading or syncing.
If your recipients don’t get the invite, make sure you resend the invitation properly. For example, in iOS, go to the shared album’s settings, select the person’s name, and tap “Resend Invitation.” Keep in mind that deleted invitations can be restored by re-inviting the person from your contacts.
Avoid sharing huge albums at once because this can slow down the process or cause failure. Use smaller batches or make sure your device has enough storage.
Resolving Permission Problems
You control who can see and add photos to your shared album through subscriber permissions. If someone cannot view or add photos, check their subscriber status in the album’s People settings.
Permissions issues often arise if a person was removed and not properly re-invited. To fix this, remove them completely and invite them again from your contacts.
Make sure everyone uses compatible devices or apps that fully support shared albums. Note that apps like OneDrive do not share albums the same way, so syncing across different platforms can cause permission mismatches.
If shared album invites aren’t showing up, double-check that notifications are enabled for your Photos app. Also, verify that people have accepted the invite before expecting them to access the album.
Fixing Sync or Upload Issues
If albums fail to sync or photos do not upload, start by checking your internet connection on all devices.
Force syncing by toggling Shared Albums off and back on in your settings. Wait a few minutes between turning it off and back on.
Back up your photos regularly because shared albums only store lower-resolution copies. If you delete a photo from your main library after sharing, you lose access to the original high-quality file.
Make sure your device and the Photos app are updated to the latest version. Older software may cause syncing delays or failures.
If you still experience issues, try accessing shared albums on a different device to confirm whether the problem is device-specific. This step helps isolate whether sync problems are local or cloud-based.
Best Practices for Sharing Photo Albums Securely
When you share photo albums, control over who can see and add content is key. You also need to avoid accidentally sharing with the wrong people. Lastly, keeping a backup of your shared photos helps protect your memories from loss.
Managing Album Privacy Settings
Always check and update your shared album’s privacy settings. Use features that let you invite specific people by email or contact list. Avoid setting albums to public unless you want anyone to see your photos.
Enable options like Subscribers Can Post only if you trust everyone invited. This controls who can add photos or comments. Use settings to remove people you no longer want in the album.
If your platform allows, turn on notifications for new additions or comments. This helps you stay aware of activity in your shared album and respond quickly if needed.
Avoiding Unintended Sharing
Be careful when sharing shared album links. Use private invites instead of public or open links whenever possible. Public links let anyone with the URL view your photos, which can lead to unintended exposure.
Before adding new photos, double-check which album you are uploading to. It’s easy to accidentally add private pictures to a shared album. Use distinct album names to avoid confusion.
Limit the number of subscribers to only those you trust. Remove inactive or unknown users promptly to maintain privacy. Also, review shared album settings after major device updates or syncing changes.
Backing Up Shared Album Content
Always save important photos from shared albums to your personal library. If you rely solely on shared albums, a deleted album means losing all the photos permanently for everyone.
Use the import or download option frequently to keep copies on your device. Consider a cloud backup service separate from your shared album to protect your photos in case of accidental deletion or account issues.
Regularly backup your photo library, including shared album contents, on an external drive or secondary cloud service. This extra step ensures your photos stay safe even if one source fails.