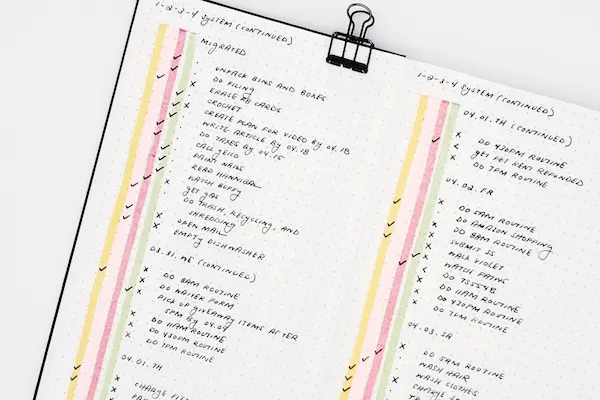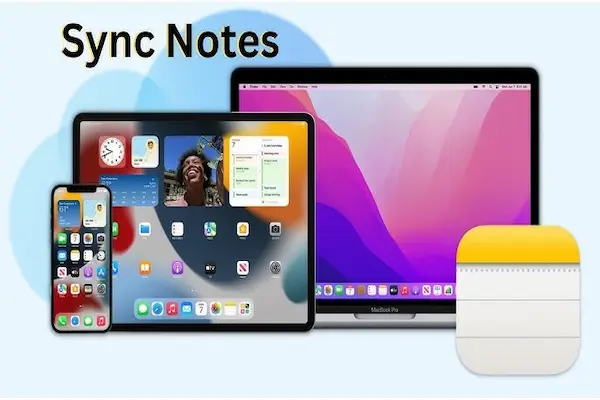
Keeping your notes synced across your devices helps you stay organized and ready wherever you are. Whether you use an iPhone, iPad, Mac, or Android device, syncing ensures that any change you make on one device appears automatically on the others.
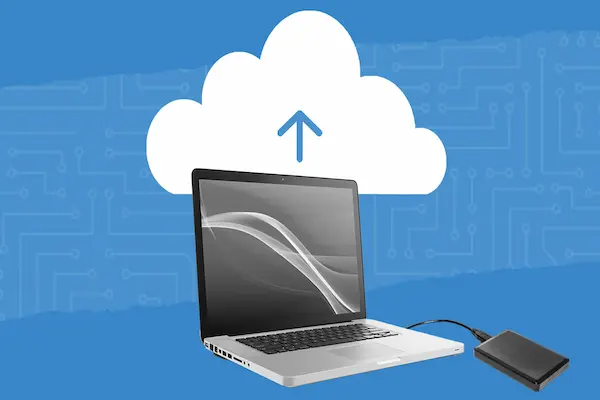
The easiest way to sync your notes is by using cloud services like iCloud for Apple devices or Google for Android, which update your notes in real time across all your devices.
To get started, you need to enable syncing in your device settings and sign in with the same account on each device. This process makes sure your notes are stored in the cloud, not just locally, so you won’t lose access if you switch devices or lose one.
Most note apps, including Apple Notes and Google Keep, offer these sync options.
Syncing can also help you collaborate and share notes with others, making it more than just a backup tool. Once you set up syncing correctly, you can make changes anywhere your devices keep all your notes up to date automatically.
Understanding Cross-Device Note Syncing
Syncing your notes lets you access and edit the same information on all your devices without losing changes. It works behind the scenes to make sure your notes are current everywhere.
You get benefits like avoiding duplicates, having backup copies, and staying organized no matter which device you use.
What Is Note Synchronization?
Note synchronization is the process of keeping your notes consistent across devices by connecting them through the cloud. When you make changes on one device, syncing updates those changes on all others linked to your account.
This typically happens automatically when connected to the internet.
You usually need to sign in with the same account on every device you use. The notes are stored in a cloud service like OneDrive or Google Drive.
Syncing prevents you from manually copying notes or risking outdated versions.
How Syncing Keeps Notes Updated
Notes sync by uploading changes to the cloud and then downloading those changes to your other devices. This happens almost instantly with a steady internet connection.
If you work offline, your device saves changes locally and syncs them when you reconnect.
You can also trigger manual syncing if needed. Most apps show sync icons or status messages to let you know if syncing is in progress or if there is an error.
Benefits of Multi-Device Sync
Syncing notes across devices means you never have to carry physical notebooks or send files to yourself. You can start writing on your phone, continue on your laptop, and check updates on your tablet.
It also protects you from data loss by backing up notes to the cloud. Shared notebooks update changes in real time for everyone involved.
Syncing saves time, keeps your information consistent, and supports better collaboration, all without extra effort on your part.
Setting Up Note Sync on iOS
To sync your notes across your iPhone and other devices, you need to adjust a few key settings. This includes enabling iCloud sync for Notes, confirming your device meets system requirements, and customizing how Notes work on your iOS device.
Enabling iCloud Notes Sync
Start by opening Settings on your iPhone or iPad. Tap your name at the top to access your Apple ID settings.
Next, select iCloud.
In the iCloud options, find Notes and toggle it on. This allows your notes to sync automatically across devices using the same Apple ID.
If you don’t see Notes listed, tap See All or Show All to find it.
Once enabled, your notes are saved in iCloud instead of just locally on your device. Open the Notes app and select All iCloud in the folder list to view synced notes.
Device Compatibility and Requirements
Your iOS device must be running iOS 13 or later for seamless iCloud Notes syncing. Older versions may not support this feature fully or may cause sync delays.
Make sure your device is signed in with the same Apple ID across all devices where you want to access synced notes. Using multiple Apple IDs will prevent notes from showing across devices.
A stable internet connection is required for syncing to work properly. If your device is offline, changes will sync once it reconnects to Wi-Fi or cellular data.
Managing iOS Notes Settings
Within the Settings app, you can control how Notes behave on your device. Go to Settings > Notes to find options like Default Account.
This lets you choose if new notes save to iCloud or locally on your iPhone.
You can also manage settings like sorting notes by date or title, enabling password protection, and adjusting how checklists behave.
If you use multiple accounts (such as Gmail or Yahoo), Notes can sync with them, but iCloud is the most reliable for syncing across Apple devices. Make sure iCloud Notes is your default for best results.
How to Sync Notes on macOS Devices
Syncing your notes on macOS lets you access and update them across all your Apple devices. You need to connect Notes with iCloud, manage sync settings properly, and understand how syncing on macOS differs from iOS.
Connecting Notes With iCloud on macOS
First, sign in to your Apple ID on your Mac through the Apple menu > System Settings and click your name at the top. If you aren’t signed in, you must enter your Apple ID and password.
Next, go to iCloud settings and find Notes. Depending on your macOS version, you may need to click “Show All Apps” to locate Notes.
Turn on sync for Notes by enabling “Sync this Mac” or simply turning on Notes.
Once enabled, open the Notes app and check the Folder list. You should see “All iCloud” or other iCloud folders.
Notes stored here automatically sync across your devices linked to the same Apple ID.
Troubleshooting Sync on Mac
If your notes aren’t syncing, first ensure that your Mac is connected to the internet. Open System Settings and verify you’re signed in with the correct Apple ID.
Check that Notes sync is turned on in iCloud settings. Restart your Mac to refresh background processes that handle syncing.
Also, keep macOS updated, since outdated versions can cause syncing problems. If issues persist, logging out of iCloud and logging back in may help reset sync connections.
Differences Between macOS and iOS Sync
Syncing notes on macOS works much like iOS but with some interface differences. macOS offers easier access to folders through a sidebar, while iOS uses tabs and menus.
macOS sometimes requires more steps to turn on sync due to different settings locations and system versions. On iOS, syncing is often automatic once iCloud Notes is enabled.
Both macOS and iOS support two-way sync, meaning changes on one device appear on all others. However, macOS also supports syncing via the Files app and can integrate with more desktop features like drag-and-drop attachments.
Syncing Notes Across Android Devices
You can keep your notes updated and accessible on all your Android devices by syncing them properly. This involves using your Google account, choosing the right apps that automatically sync, and understanding some limits you may face with syncing.
Google Account Sync for Notes
Your Google account is the easiest way to sync basic notes on Android. When you sign into the same Google account on multiple devices, your notes in apps like Google Keep sync automatically.
To enable this, simply open Google Keep, tap the menu, and make sure sync is turned on in your account settings. Any changes you make appear on all devices linked to your Google account.
Google Keep supports text notes, lists, voice memos, and images. It works seamlessly on Android phones and tablets, and even on the web.
Third-Party Note Apps for Android
Several apps offer advanced syncing features beyond what Google Keep provides. Apps like Evernote, OneNote, and Samsung Notes let you sync text, drawings, and multimedia across devices.
Each app requires you to create an account on their platform. For example:
| App | Sync Method | Key Features |
|---|---|---|
| Evernote | Cloud Sync | Auto sync, tagging, multimedia |
| OneNote | Microsoft Cloud | Sync across Android, Windows, iOS |
| Samsung Notes | Samsung Cloud | Handwriting, sketches, tablets |
You need to install the same app on all devices and sign in. Sync usually happens automatically over Wi-Fi or mobile data.
Some apps let you manually sync if needed.
Restrictions and Considerations
Syncing notes on Android depends on your internet connection. Without Wi-Fi or mobile data, changes won’t update until you’re online.
Some apps only work fully within their own ecosystem. For example, Samsung Notes syncs best between Samsung devices.
Using it on non-Samsung devices may limit some features.
Also, storage limits on cloud services may affect syncing, especially if you save large files or many notes. Check your cloud storage and clean up old files if sync slows down.
Finally, syncing features vary between free and paid app versions. Some advanced sync options might require subscriptions.
Always review app details before choosing your note sync method.
Cross-Platform Note Syncing Methods
You can keep your notes updated across all your devices by using several reliable syncing methods. These involve cloud services, popular third-party apps, and adapting syncing strategies when working across different operating systems like iOS, macOS, and Android.
Using Cloud Services for Sync
Cloud services store your notes on secure remote servers, making them accessible from any device connected to the internet. Services like OneDrive, iCloud, and Google Drive offer seamless syncing by automatically updating changes as you edit notes.
Using cloud syncing means you don’t have to manually transfer files between devices. On iOS and macOS, iCloud works well because it’s integrated deeply into the system.
For Android and Windows, Google Drive and OneDrive provide wider compatibility.
You must sign in with the same account on every device. Your notes sync automatically when you have internet access.
If you lose connection, changes are saved locally and uploaded once you’re back online.
Popular Third-Party Apps (Evernote, OneNote, Obsidian)
Apps like Evernote, OneNote, and Obsidian are designed to sync your notes across multiple devices and platforms seamlessly.
Evernote uses its own cloud to keep your data synced. It supports iOS, macOS, Android, Windows, and web versions, making it easy to switch devices.
It also offers tagging, search, and organization tools.
OneNote syncs via OneDrive and supports real-time collaboration. You can use it on Windows, macOS, iOS, Android, and browsers.
Sync happens automatically but can be done manually if needed.
Obsidian works with local files and cloud services like Dropbox or OneDrive for syncing. It’s popular for Markdown notes and supports iOS, macOS, Android, and Windows.
You control where your data syncs, adding privacy and flexibility.
Syncing Between Different Operating Systems
Syncing notes between iOS, macOS, Android, and Windows means choosing apps or services compatible with multiple platforms. Native apps like OneNote and Evernote handle this well, bridging gaps between systems.
If you use iOS or macOS, iCloud works best, but it’s not available on Android or Windows. For those, Google Drive or OneDrive integration is a better bet.
You should also check for differences in app features by platform. Some versions may lack offline access or manual sync options.
Always ensure your app is up to date on all devices to avoid syncing errors.
Key tips: enable automatic syncing, sign in with the same account, and test after setup to confirm everything stays current.
Manual and Automatic Note Syncing
You can keep your notes updated across devices either automatically or by syncing manually. Automatic syncing saves your changes instantly in the cloud, while manual syncing lets you decide exactly when to update your notes.
Understanding these processes helps you manage your data efficiently and avoid syncing problems.
Automatic Real-Time Sync Options
Automatic syncing happens in the background whenever you make changes to your notes.
This option requires an active internet connection and a linked Microsoft account.
Your device sends only the changes, not entire files, which makes syncing faster and uses less data.
This is the default syncing method for most OneNote apps on Windows, Mac, web, and mobile.
It ensures your notes are updated on all your devices almost instantly.
If you close the app or device, it will attempt to sync before shutting down to avoid data loss.
However, it depends on a stable internet connection and does not allow you to control when data is sent.
How to Manually Force a Sync
If you want to make sure your notes are backed up right away, you can sync manually.
This is useful before losing internet access or shutting down your device.
To force a manual sync in OneNote, open the notebook, then select the Sync Now option from the app menu or right-click the notebook name and click Sync This Notebook.
You can also sync all open notebooks at once if needed.
Manual syncing ensures the latest changes upload immediately.
It is helpful if auto syncing delays or errors occur, or if you want to avoid conflicts by syncing before working on another device.
Sync Frequency and Data Usage
Sync frequency varies based on the app and connection.
Automatic syncing typically checks for updates every few seconds to minutes.
Manual syncing happens only when you trigger it.
Frequent syncing uses more data, especially if your notes contain multimedia like images or audio.
If you have a limited data plan, you may want to sync manually to reduce usage.
You can control syncing settings in some apps, such as setting a delay or limiting sync to Wi-Fi only.
This lets you balance staying updated with managing data and battery life.
Check your app’s sync settings for customization options.
Troubleshooting Common Note Sync Issues
Sync problems often happen because of errors, account troubles, or network conflicts.
You can fix most issues by checking for updates, managing your account settings, and protecting your data from loss during syncing.
Sync Errors and Fixes
When your notes don’t sync, you might see error codes like E000006C or messages such as “Saved offline (error).”
Start by updating your app to the latest version on iOS, macOS, or Android.
Then, try manually syncing your notebook.
On macOS or iOS, you can force sync by selecting your notebook, control-clicking it, and choosing Sync This Notebook.
If you see a “Refresh Now” option, tap it to resume syncing.
For persistent errors, check if your notebook opens in a web browser at onenote.com.
If it does, close and reopen the notebook in your app.
If not, the problem may be with the server.
Resolving Account or Network Conflicts
Sync issues may occur if you’re signed out or have network problems.
Always make sure you’re logged into your Microsoft or iCloud account properly.
If you see authentication or “server is busy” errors, try signing out of OneNote, then sign back in.
On macOS or iOS, do this from the OneNote menu.
Check your Internet connection on your device by opening a browser or another cloud app.
A weak or unstable network often causes sync delays on all platforms, including Android.
Preventing Data Loss During Sync
Notes can conflict if you and others edit the same section simultaneously.
OneNote creates copies to prevent data loss, but you should merge content manually.
To fix this, copy all conflicting text from the duplicate page and paste it into the main note.
Then, you can safely delete the extra version.
Avoid syncing problems by not moving or deleting sections during syncing.
If a section looks misplaced, move it to another notebook rather than deleting it.
This protects your notes from being lost forever.
Best Practices for Secure and Reliable Note Syncing
Ensuring Data Privacy and Security
Use apps that offer strong encryption for your notes, both when stored and during syncing.
Encryption protects your data from being accessed by unauthorized parties.
If privacy matters to you, consider apps that let you self-host your notes.
This means you control where your data is stored, avoiding large cloud services that may track or scan your notes.
Always use secure passwords and enable two-factor authentication if your app supports it.
This prevents unauthorized access even if your password is compromised.
Avoid using public Wi-Fi to sync notes unless you use a trusted VPN.
Unsecure networks can expose your data while syncing.
Regular Backups and Sync Verification
Set up automatic backups of your notes in addition to syncing.
Backups help you recover your information if syncing fails or your device crashes.
Check your sync settings to make sure sync is active and working on all your devices.
Sometimes apps pause syncing without warning, leading to missing or outdated notes.
Test syncing by creating a new note and accessing it on another device.
Verifying sync regularly avoids surprises when you need your data most.
If your app offers version history, use it to restore earlier versions of notes if syncing causes errors or data loss.
Tips for Organizing Synced Notes
Keep your notes organized with clear folder structures or tags.
This helps you quickly find what you need, especially when your notes sync across many devices.
Use consistent naming and categorization methods so your notes stay uniform across platforms.
Separate sensitive information from general notes by storing it in local, non-synced folders if your app allows.
This limits exposure of private data.
Regularly clean up old or duplicate notes to keep your synced collection manageable.
This also helps your notes load faster on all devices.